
How to Prep Pizza Like a Pro
Share
Why Professional Pizza Prep Makes All the Difference
Pizza prep is the foundation of every great pizza, changing simple ingredients into a culinary masterpiece through proper technique and organization. Whether you're running a busy pizzeria or perfecting your home pizza game, mastering the preparation process separates amateur pies from professional-quality results.
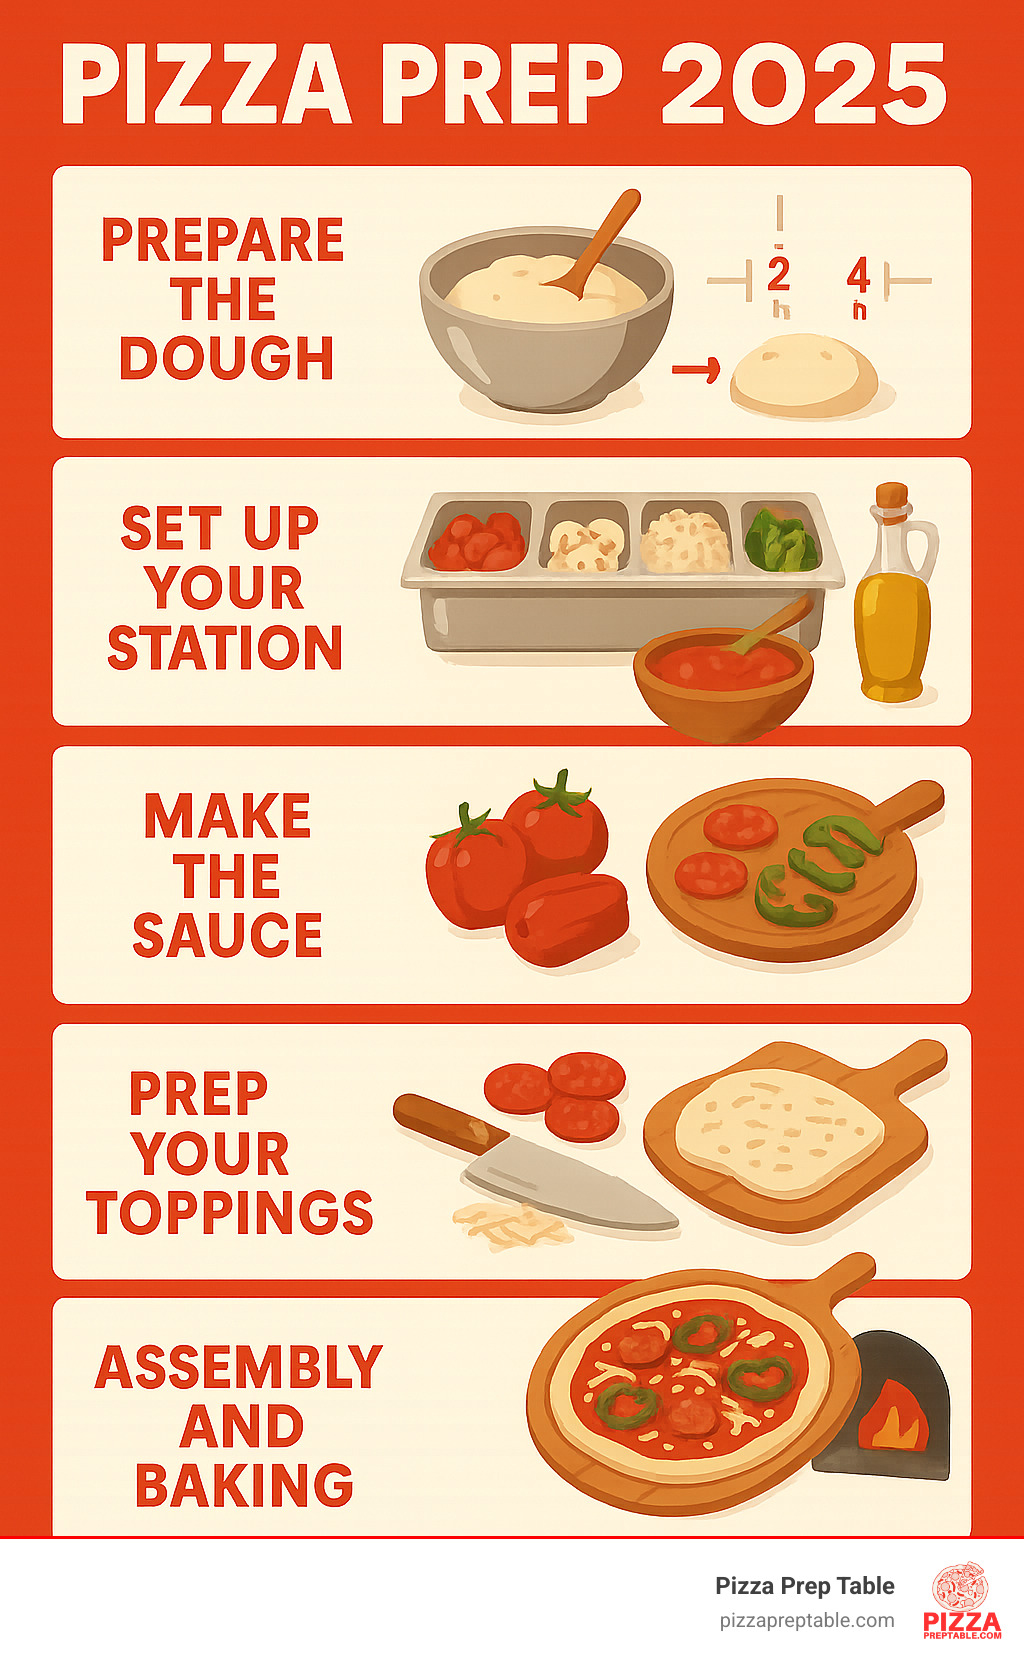
Essential Pizza Prep Steps:
- Prepare the dough - Mix, knead, and ferment for optimal flavor
- Set up your station - Organize all ingredients within easy reach
- Make the sauce - Use quality tomatoes and keep it simple
- Prep your toppings - Slice vegetables thin, portion cheese, pre-cook meats
- Assembly and baking - Stretch dough, add toppings, transfer to oven
The key to consistent, delicious pizza lies in what the pros call mise en place - having everything in its place before you start cooking. This French culinary term means more than just organization; it's about creating a workflow that eliminates stress and ensures every pizza meets your standards.
Professional pizzerias rely on specialized equipment like commercial pizza prep tables to maintain this efficiency. These refrigerated workstations keep ingredients at food-safe temperatures (33°F to 41°F) while providing ample workspace and organized storage. The difference between a chaotic kitchen and a smooth operation often comes down to having the right setup.
I'm Sean Kearney, and my background in sales and deep appreciation for the foodservice industry has taught me that the right pizza prep equipment can make or break a restaurant's efficiency and profitability. From my experience helping cafes and restaurant chains upgrade their kitchens, I've seen how proper preparation techniques and quality equipment transform both the cooking process and the final product.
Easy pizza prep word list:
The Foundation: Mastering Pizza Dough
Great pizza starts with great dough - it's really that simple. Think of your dough as the canvas for your pizza prep masterpiece. Without a solid foundation, even the best toppings in the world won't save your pizza. The good news? Once you understand the basics of flour, water, yeast, and time, you're well on your way to creating restaurant-quality crusts.
Choosing Your Flour and Ingredients
Your flour choice sets the stage for everything that follows. '00' flour is the gold standard for pizza - this finely milled Italian flour creates that perfect chewy texture with beautiful leopard spots when it hits high heat. Don't worry if you can't find it though. Bread flour works wonderfully too, giving you that nice gluten structure for a stretchy, workable dough. Even all-purpose flour can make excellent pizza when handled properly.
The magic happens when you get your ratios right. For every 100 grams of flour, you'll want about 65-70 grams of water - this hydration level gives you dough that's easy to work with but still develops great texture. Yeast activation is crucial here. Whether you're using active dry yeast or instant yeast, make sure your water temperature sits around 100-110°F. Too hot, and you'll kill the yeast. Too cold, and it won't wake up properly.
Don't forget your supporting players. Salt does more than add flavor - it controls yeast activity and strengthens your gluten network. A small splash of olive oil adds richness and helps with dough handling. When mixing, add water to your bowl first, then flour. This simple trick helps everything come together faster and more evenly.
If you're ready to take your dough game to the next level, a stand mixer can be a game-changer. Check out our guide on Mixing It Up: Mastering Pizza Dough Kneading in Your Stand Mixer for detailed techniques.
The Kneading and Fermentation Process
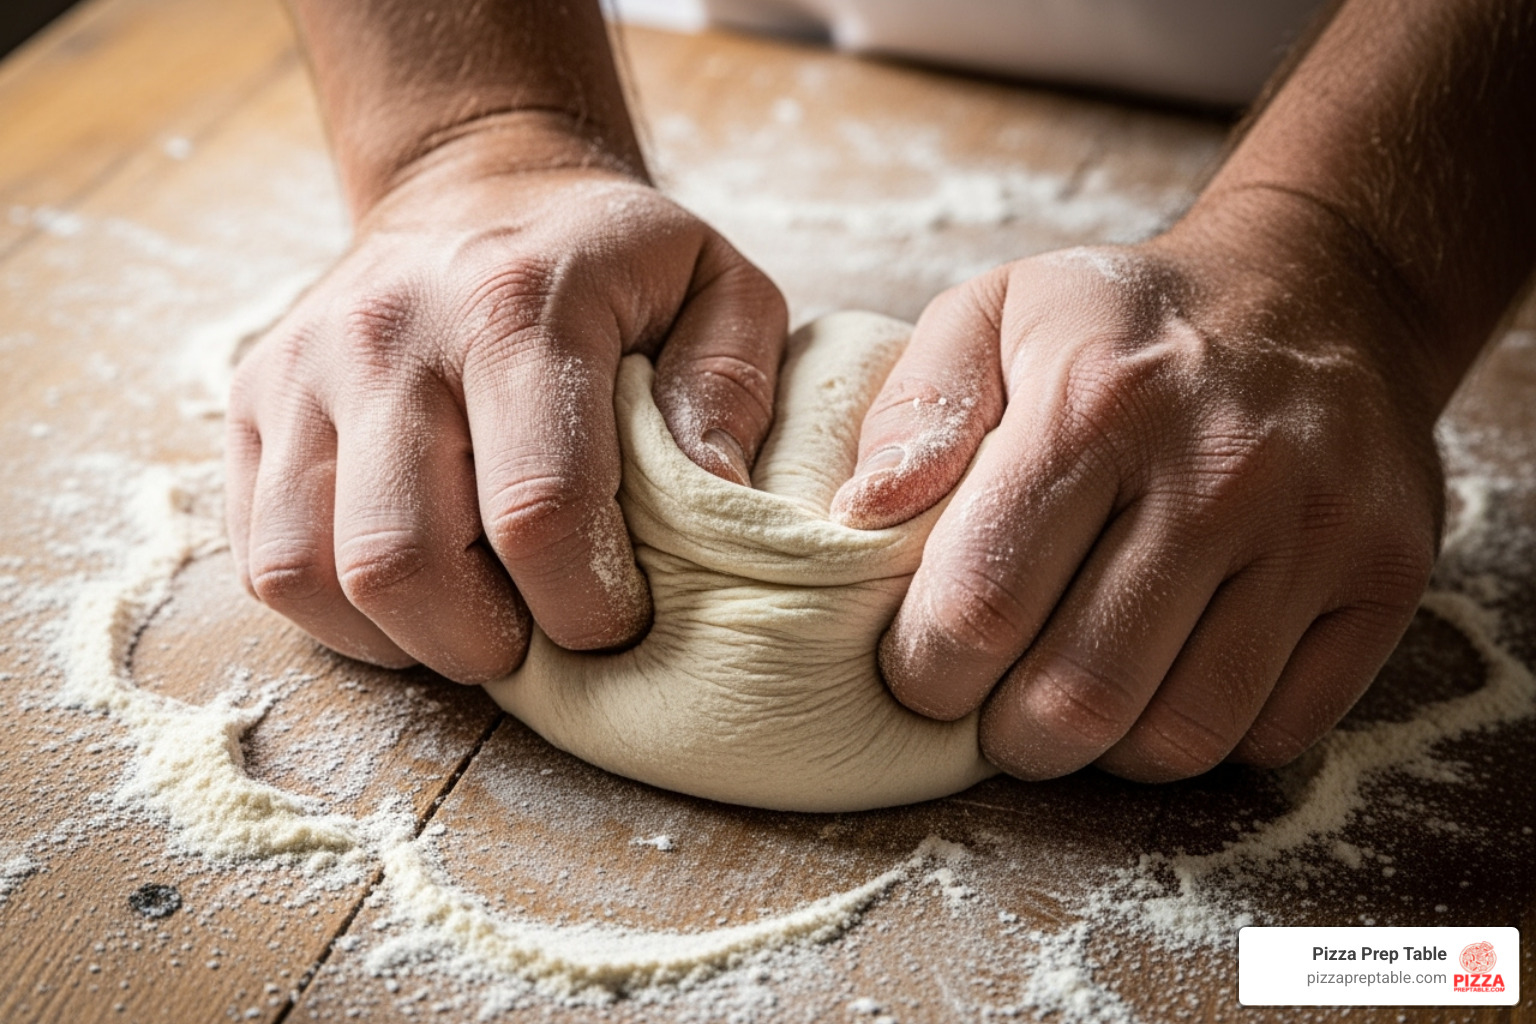
Here's where patience pays off big time. Kneading by hand takes about 15-20 minutes of steady work, but there's something deeply satisfying about feeling the dough transform under your hands. You'll know you're done when the dough becomes smooth and elastic - it should feel soft and slightly tacky, not sticky.
For busy kitchens, stand mixer kneading cuts that time in half. Commercial operations often use spiral mixers that gently work the dough without overheating it. The goal is always the same: develop that gluten structure that gives pizza its signature chew.
But here's the real secret - cold fermentation is where flavor magic happens. Pop your dough in the fridge for 48-72 hours, and watch simple ingredients transform into something complex and delicious. This slow, cold rise develops flavors you simply can't get from quick room temperature proofing.
Even commercial yeasted doughs benefit from this extended fermentation. The longer you can give your dough to develop, the better it will taste. Professional pizzerias often prepare dough 2-3 days ahead, rotating through batches to ensure consistent quality.
For high-volume operations, investing in proper dough equipment makes all the difference. Our guide to Rise to the Occasion with These Pizza Dough Kneading Machines covers everything from countertop mixers to commercial spiral mixers that can handle serious volume.
Setting Up Your Professional Pizza Prep Station
Alright, you’ve mastered your dough, and your ingredients are looking top-notch. Now, let’s talk about where the real magic happens: your pizza prep station! In any kitchen, especially when you're slinging delicious pizzas, efficiency is super important. A well-organized prep area isn't just about making things faster; it's the secret sauce for keeping everything consistent, super clean, and, most importantly, safe to eat.
The Importance of "Mise en Place"
Ever heard the fancy French term, "Mise en place"? It simply means "everything in its place." And trust us, it's more than just a culinary saying; it's a way of life in a pro kitchen! For pizza prep, it means you've got everything ready to go before you even start building that pie.
Think of it this way:
- Your veggies are sliced paper-thin and looking colorful.
- Meats are pre-cooked and diced perfectly.
- Cheeses are portioned out and ready to sprinkle. (Pro tip: for mozzarella, some pros even dry it a bit to avoid a soggy pizza!)
- Your amazing sauce is prepped and waiting its turn.
All these ingredients are neatly tucked away in pans, sitting pretty in the refrigerated rail of your prep table. When everything is prepped and organized like this, it takes away all the stress, cuts down on mistakes, and speeds up your pizza assembly big time. This way, you can focus on making each pizza a masterpiece. Plus, it's a huge win for food safety, as your ingredients spend less time getting warm.
Want to learn more about setting up your kitchen for success? Check out our guide on Commercial Food Prep Equipment.
Essential Equipment for Efficient Pizza Prep
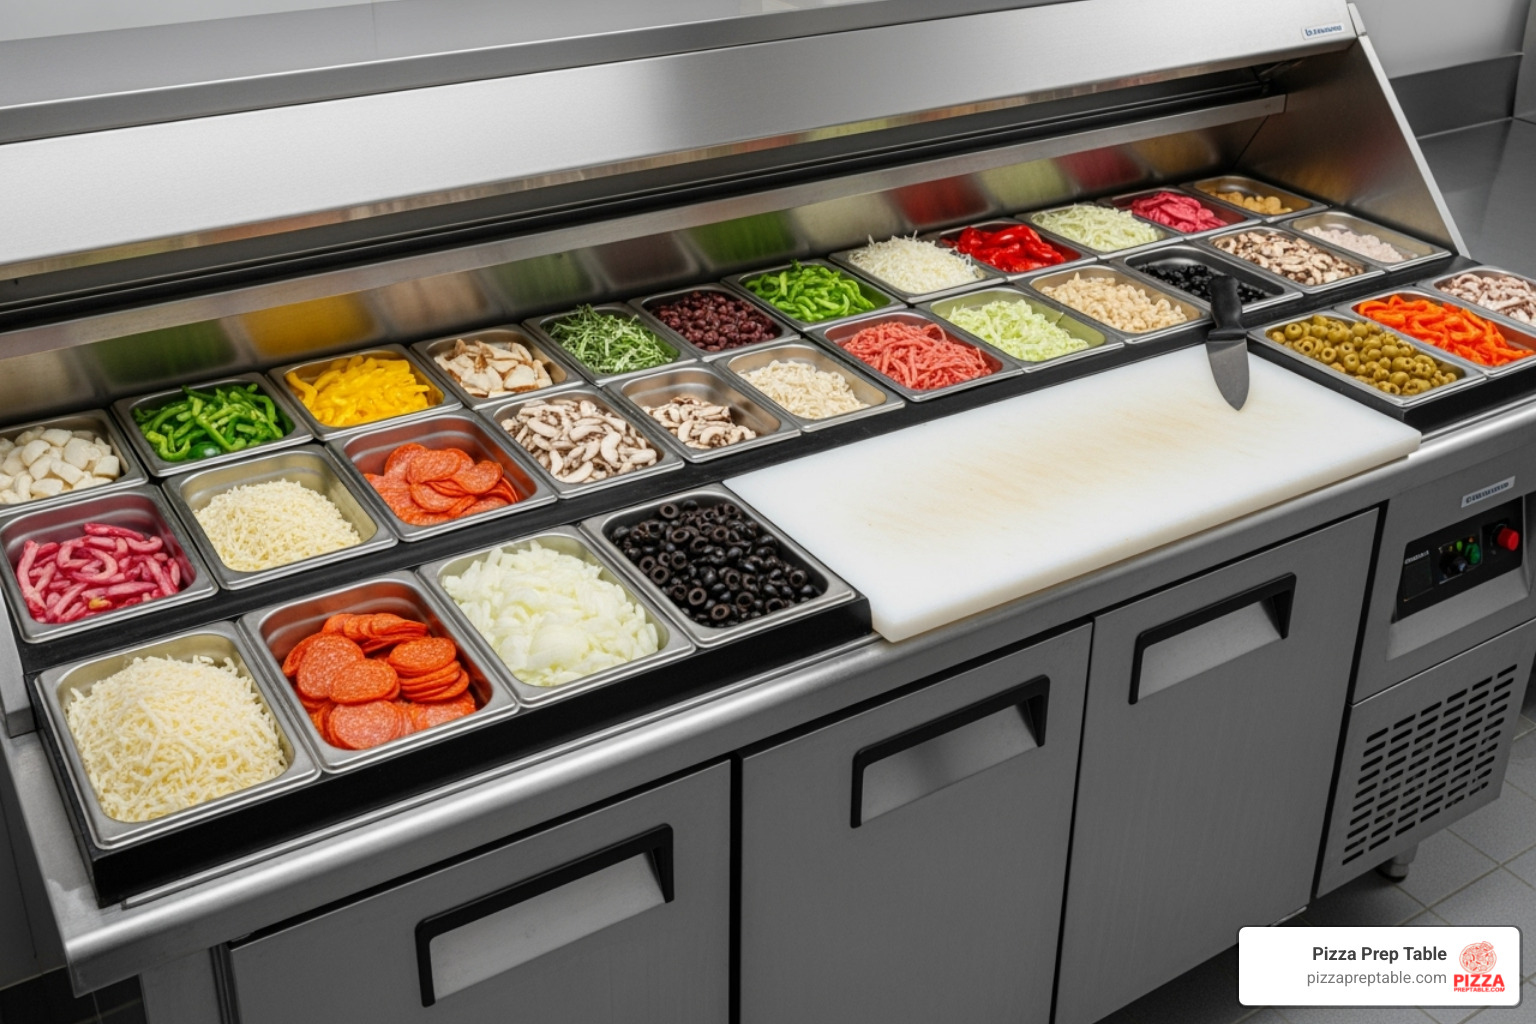
And now for the star of the show: the commercial pizza prep table! This specialized piece of equipment is truly the heart of any professional pizza prep station. It's designed to make your pizza-making process incredibly smooth.
So, what makes these tables so indispensable?
First off, they come with a refrigerated pan rail. This is super important! It holds all those pans of ingredients (usually 9 to 12 of them, about 4 inches deep) at the perfect, food-safe temperature, typically between 33°F and 41°F. Brands like Beverage-Air, Avantco, True, Migali, Hoshizaki, and Marra Forni all make excellent models with this feature. Some, like Hoshizaki's Steelheart® series, even have clever dual controllers to keep the rail and the cabinet below at their ideal temperatures, even in a day/night mode to prevent freezing!
You'll also find a deep cutting board built right in. These are usually made from strong, durable polyethylene and are about 17.75 to 19.5 inches deep. This gives you plenty of space to stretch your dough and put your pizza together without feeling cramped. It’s a real game-changer for speed!
Most of these tables are built with stainless steel construction on the outside and easy-to-clean aluminum inside. This means they're tough enough for a busy kitchen and meet all those important hygiene rules.
Underneath the refrigerated pan rail, you'll find handy under-counter storage. This refrigerated space, often with doors or drawers, is perfect for keeping extra bulk ingredients, your perfectly portioned dough balls, or even full-size sheet pans. These tables come in all sizes, from smaller 44-inch or 46-inch units (like the True TPP-AT-44-HC or Beverage-Air DP46HC) to bigger 60-inch or 71-inch two-door tables (like the Beverage-Air DP60HC or Avantco APPT-71-HC). Some get massive, like the 119-inch, eight-drawer Beverage-Air DPD119HC-8! Marra Forni even offers models with sleek granite work surfaces that help keep things cool.
Precise temperature control and insulation are key. Digital controls make sure your ingredients stay at a consistent temperature, which is vital for safety and freshness. Good insulation (often CFC-free urethane foam) also helps save energy, especially with newer refrigerants like R290, which can cut energy use by up to 40%!
You’ll also appreciate the adjustable shelves and how easily they can hold different pan sizes (1/3, 1/2, full-size) in the open well without needing extra adapters. Talk about versatile!
And for easy cleaning or just moving things around, many units come with mobility thanks to 3-inch swivel casters with brakes.
When you're choosing a commercial pizza prep table for your business, think about your kitchen size, how many pizzas you'll be making, and what kind of storage you need. Prices can vary quite a bit, from around $1,599 to over $20,000, depending on the size, brand, and features. Here at PizzaPrepTable.com, we offer a huge selection of these essential units. We even have financing options to help businesses of all sizes, from small local shops to bigger spots in busy cities like New York City, Los Angeles, Chicago, Philadelphia, and Dallas.
Don't forget that regular maintenance, like cleaning those removable air filters, will keep your table running smoothly for years to come! For more on keeping your kitchen safe, check out our Food Safety Guidelines for Restaurants.
Perfecting Your Sauce and Toppings
Once your dough is resting comfortably and your professional pizza prep station is perfectly set, we move onto the vibrant heart of your pizza: the sauce and toppings. These elements are where the magic truly comes alive, bringing unique flavors and textures to every single bite.
Crafting the Perfect Tomato Sauce
For us, when it comes to pizza sauce, simplicity and quality are absolutely paramount. We believe a truly great sauce should let the other flavors on your pizza sing, not shout over them. Our go-to choice is almost always high-quality canned San Marzano tomatoes. They're known for their lovely balance of sweetness and low acidity, making them a pizza superstar. Brands like Bianco DiNapoli, Organico Bello, or even certain seasonal offerings from Costco have consistently delivered excellent results.
Our method is wonderfully straightforward. First, we make sure to drain the tomatoes well. Sometimes, we even give them a gentle squish to remove any excess liquid. This little trick helps thicken the sauce without cooking it, which in turn prevents a soggy pizza base – nobody wants that! Then, we process the drained tomatoes with just a few simple seasonings: fresh minced garlic (sliced thinly for a burst of flavor), a touch of salt, a pinch of black pepper, and some dried basil or oregano. The aim here is a spreadable consistency, not a watery puree. For many pizza styles, a no-cook sauce is preferred because it allows that fresh tomato flavor to truly intensify during baking. It's a simple approach that guarantees a vibrant, fresh-tasting sauce that perfectly complements your other ingredients. For a taste of this freshness, check out this Tomato Basil Pizza.
Preparing Toppings for Maximum Flavor
The way we prepare and apply our toppings is just as crucial for both flavor and texture. Think of it as painting a masterpiece – every brushstroke counts!
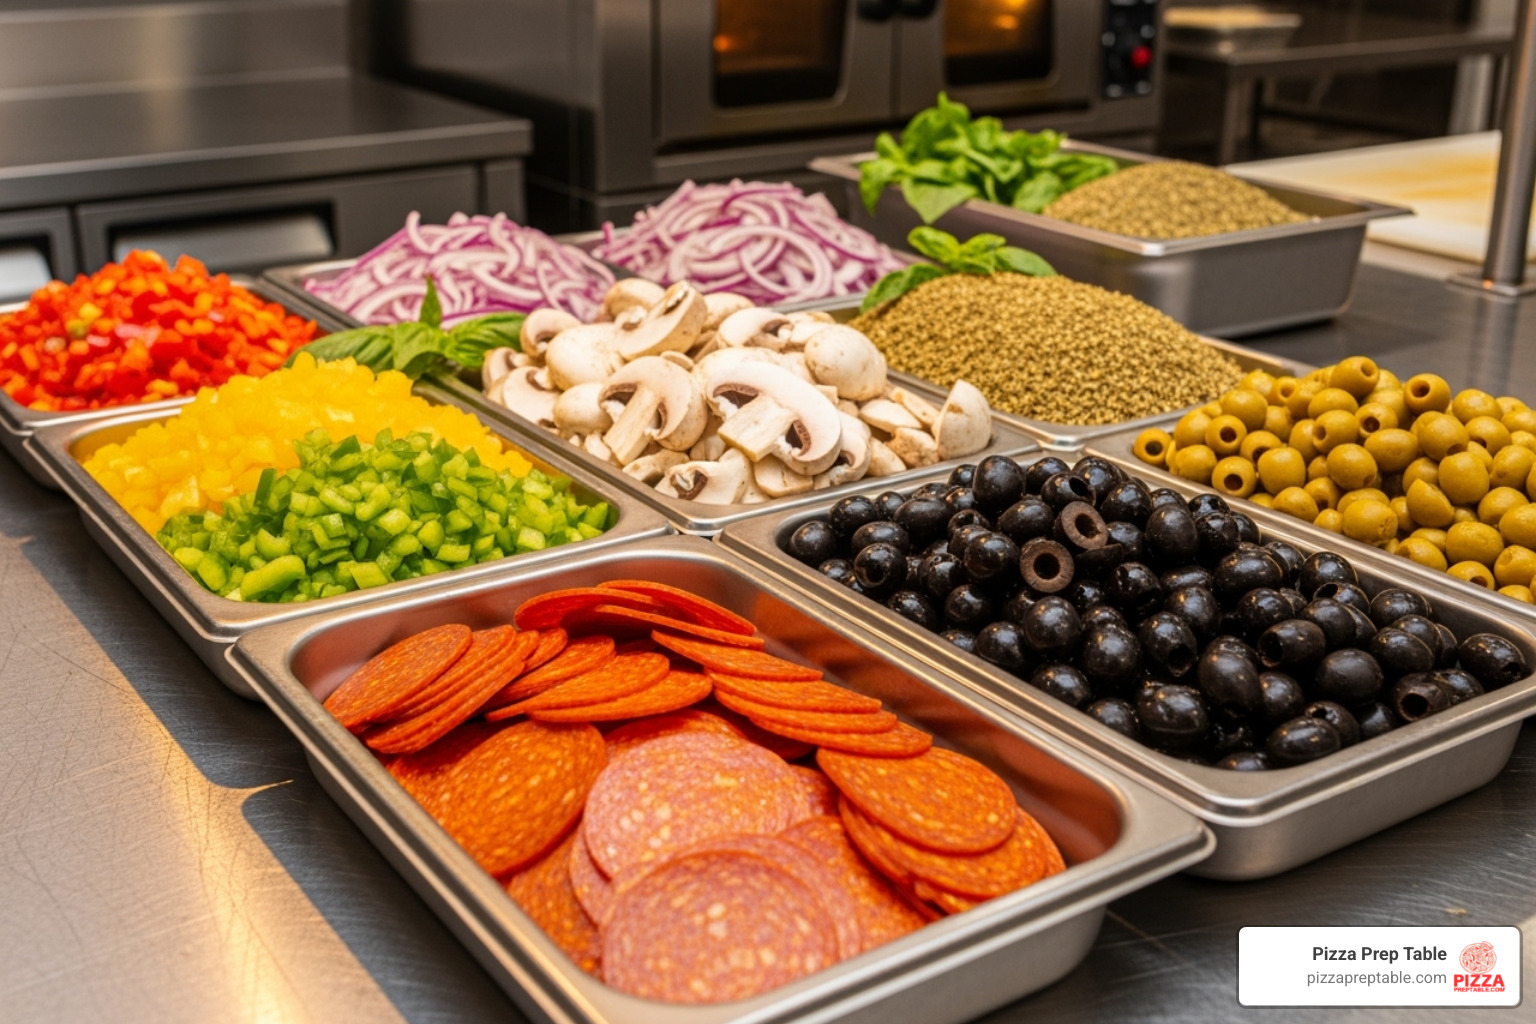
Let's talk about Fresh Mozzarella Moisture. Fresh mozzarella is undeniably delicious, but it holds a lot of water. To prevent a soggy pizza, we always squeeze and pat it dry with kitchen paper, often sandwiching it between layers to absorb as much moisture as possible. Trust us, this simple step makes a world of difference! When it comes to slicing vegetables thinly, like mushrooms or onions, it's essential. Thin slices ensure they cook through evenly and don't release too much moisture during baking. Nobody wants a chunky, undercooked veggie on their pizza, right?
For meats like sausage or ground beef, we always pre-cook meats. This ensures they're fully cooked and helps render out any excess fat, which stops your pizza from becoming greasy. Cured meats like pepperoni or prosciutto can often go straight on, though some cooked hams are best added after baking to keep them tender, not tough and dry. This leads us to our golden rule in professional pizza prep: the "Less is More" philosophy. While it's tempting to pile on every delicious topping, overloading a pizza actually leads to uneven cooking, a soggy crust, and a muddled flavor. Using toppings sparingly allows the wonderful flavor of your crust to shine through and ensures every single component cooks perfectly. It's all about balance! Finally, for cheeses like Parmesan, we often add them after the pizza is cooked. This preserves their distinct flavor, rather than having it bake away.
By carefully preparing each topping, you're building a harmonious and incredibly delicious final product. For more insights on perfecting your toppings, take a look at these 9 Tips for Making Great Pizza - Pizza Therapy.
The Assembly Line: Building Your Masterpiece
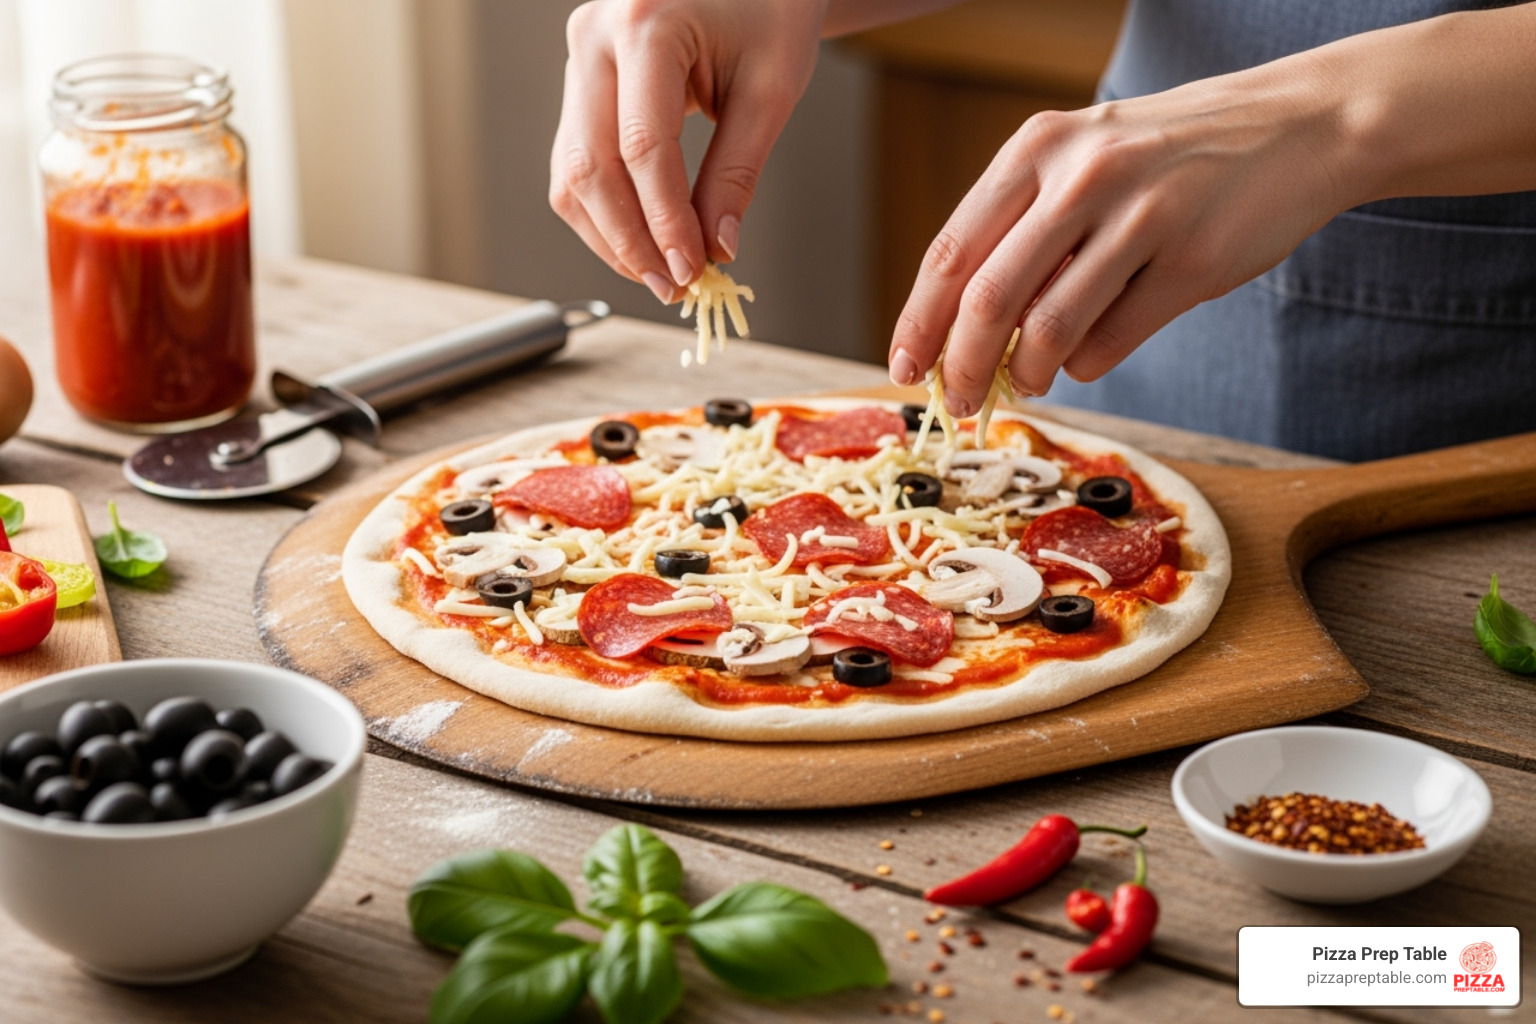
With the dough perfectly proved, the sauce ready, and the toppings prepped, it's time for the grand finale of pizza prep: assembly. This stage requires a delicate touch and precise timing, changing individual components into a cohesive masterpiece ready for the oven.
Stretching and Shaping Your Dough
Here's where the magic happens, and honestly, it's one of my favorite parts of the entire pizza prep process. Professional pizzaiolos rarely use rolling pins, and there's a good reason for that. Rolling pins push out all those precious air bubbles that developed during fermentation, leaving you with a dense, flat crust that lacks character.
Instead, we stretch and shape the dough by hand, treating it with the respect it deserves after all that careful fermentation. Start by placing your dough ball on a lightly floured surface - semolina flour works beautifully here, creating a crispy base while preventing sticking.
Gentle handling is everything at this stage. Using your fingertips, press outwards from the center of the dough, leaving a small border around the edge. This border will become your cornicione - that puffy, airy crust that makes people's eyes light up when they see your pizza.
The stretching technique takes a bit of practice, but it's surprisingly forgiving once you get the hang of it. Lift the dough and let gravity do most of the work as you gently stretch it, rotating it between your hands. You're aiming for uniform thickness without any tears, creating a round shape that will bake evenly.
The beauty of well-fermented dough is its elasticity and those lovely air pockets within. Our gentle stretching preserves these qualities, contributing to that perfect airy, chewy crust that separates amateur pizza from the professional stuff.
From Prep to Oven: The Final Transfer
Once your dough is stretched and placed on a pizza peel, the clock starts ticking. This is where speed and confidence become your best friends - hesitation leads to stuck dough and frustrated pizza makers.
Flouring your peel properly is absolutely non-negotiable. A liberal dusting of semolina flour or cornmeal creates a barrier that allows your raw pizza to slide effortlessly into the hot oven. Always give the peel a gentle shake to ensure the dough isn't stuck before you start adding toppings - trust me on this one.
When it comes to topping order, we typically apply the sauce first, leaving that small border for the cornicione. Then come your carefully prepared toppings, followed by the cheese. Remember our "less is more" philosophy from earlier - resist the urge to overload, as this leads to uneven cooking and a soggy center.
The final transfer from peel to oven needs to be swift and decisive. Position your peel at the back of your preheated pizza stone or steel, give it a gentle jiggle to make sure everything's still loose, then pull the peel back in one smooth motion. The pizza should slide off beautifully onto the hot surface.
For home bakers without a proper peel, an upside-down baking tray heavily dusted with flour can work as a makeshift solution, or even a well-floured cutting board. However, for truly professional results, investing in a good pizza peel makes all the difference in your pizza prep workflow.
Frequently Asked Questions about Pizza Prep
Even seasoned pizza makers encounter challenges during pizza prep and baking. These common questions come up time and again in professional kitchens and home setups alike. Let me share the solutions that have saved countless pizzas from disaster.
How do I stop my pizza from getting soggy in the middle?
Nothing ruins a perfect pizza prep session quite like pulling a soggy pizza from the oven. The good news? This frustrating problem is completely preventable once you understand what's happening.
The culprit is almost always excess moisture. When there's too much liquid on your pizza, it creates steam instead of allowing the crust to properly bake. Use less sauce than you think you need – a thin, even layer is plenty. Your sauce should improve the pizza, not drown it.
Remove moisture from toppings before they go anywhere near your dough. Fresh mozzarella is the biggest offender here. Squeeze it gently and pat it completely dry with paper towels. For vegetables like mushrooms or tomatoes, slice them thin and consider pre-cooking watery vegetables to eliminate excess moisture.
The "don't overload the pizza" rule becomes critical here. I know it's tempting to pile on your favorite toppings, but restraint pays off with a perfectly crispy crust. Too many toppings create a heavy, moist blanket that prevents proper cooking.
High oven heat is your best friend for avoiding sogginess. The intense temperature cooks the pizza quickly, crisping the crust before moisture can make it soggy. Pair this with a preheated pizza stone or steel that's been heating for at least an hour, and you'll get that coveted crispy bottom crust every time.
What's the best temperature to bake homemade pizza?
Forget everything you've heard about moderate oven temperatures for pizza. High heat is absolutely crucial for authentic results, and most home cooks don't go nearly hot enough.
Commercial pizzerias making New York-style pizza run their ovens between 500-600°F, while authentic Neapolitan ovens reach a scorching 800-900°F. Your home oven can't match those temperatures, but you can still achieve excellent results.
Preheat your oven to its highest setting – usually between 500°F and 550°F (260-290°C). Don't settle for 425°F or 450°F just because a recipe suggests it. Your oven's maximum temperature is where the magic happens.
Preheat your baking surface for at least an hour. This step is non-negotiable. Your pizza stone or steel needs to be completely saturated with heat to create that instant sear when your dough hits the surface. An infrared thermometer can help you verify your stone has reached the right temperature.
This intense heat creates what professionals call "oven spring" – the rapid expansion of dough that gives you those beautiful air bubbles and light texture. It also triggers the Maillard reaction, creating those delicious brown spots and complex flavors that separate great pizza from mediocre pizza.
- For great homemade pizza, release the beast in your home oven...
When should I add fresh basil to my pizza?
This question trips up many pizza makers, but the answer is simple: add fresh basil after baking, not before.
Fresh basil leaves are delicate and will burn in a hot oven, turning black and bitter instead of providing that bright, peppery flavor you're after. Preventing burning isn't just about appearance – burnt basil tastes terrible and can ruin an otherwise perfect pizza.
By adding basil post-bake, you preserve the fresh flavor and aroma that makes it so special. The leaves stay vibrant green and release their essential oils when they hit the hot pizza, creating an incredible aromatic experience.
Drizzle with olive oil after adding the fresh basil for the finishing touch. A good extra virgin olive oil improves the basil's flavor and gives your pizza that glossy, professional appearance that makes mouths water.
This simple timing change transforms fresh basil from a potential disaster into the crowning glory of your pizza prep efforts.
Conclusion
Mastering pizza prep is truly where the magic happens. It's that perfect blend of technique, timing, and passion that separates a good pizza from an unforgettable one. Every step we've covered - from nurturing your dough through its slow fermentation journey to setting up your station with military precision - builds toward that moment when you slide a perfectly crafted pizza into a blazing hot oven.
The beauty of professional pizza prep lies in its systematic approach. When you accept the mise en place philosophy and invest in quality equipment like commercial pizza prep tables, you're not just making pizza faster - you're making it better. Those refrigerated pan rails keeping your toppings at the perfect 33°F to 41°F, that spacious cutting board where you can stretch dough with confidence, and all that organized storage below - it all works together to create consistency your customers can count on.
The little details make the biggest difference. Squeezing moisture from that fresh mozzarella, slicing vegetables paper-thin, and resisting the urge to overload your pizza with toppings - these techniques separate professional results from amateur attempts. And when it comes to that final transfer from peel to oven, confidence and speed are your best friends.
Whether you're just starting your pizzeria dream or looking to upgrade your existing operation, having the right equipment truly makes all the difference. At PizzaPrepTable.com, we've helped countless businesses across the country - from busy New York City joints to cozy Denver neighborhood spots - find the perfect commercial pizza prep tables and equipment to match their needs. Our financing options mean you don't have to compromise on quality, whether you're a small independent shop or a growing chain.
The path to pizza perfection starts with proper pizza prep. Invest in quality equipment, master these professional techniques, and watch as every pizza that leaves your kitchen becomes a testament to your craft.
